
Installing solar panels on your roof is an excellent way to harness renewable energy and reduce your carbon footprint.
Whether you have an asphalt, clay tile, or concrete tile roof, this guide will walk you through the process of installing solar panels with ease. We’ll cover everything from preparation and safety precautions to panel placement and wiring. Get ready to embrace sustainable energy and start saving on your electricity bills!
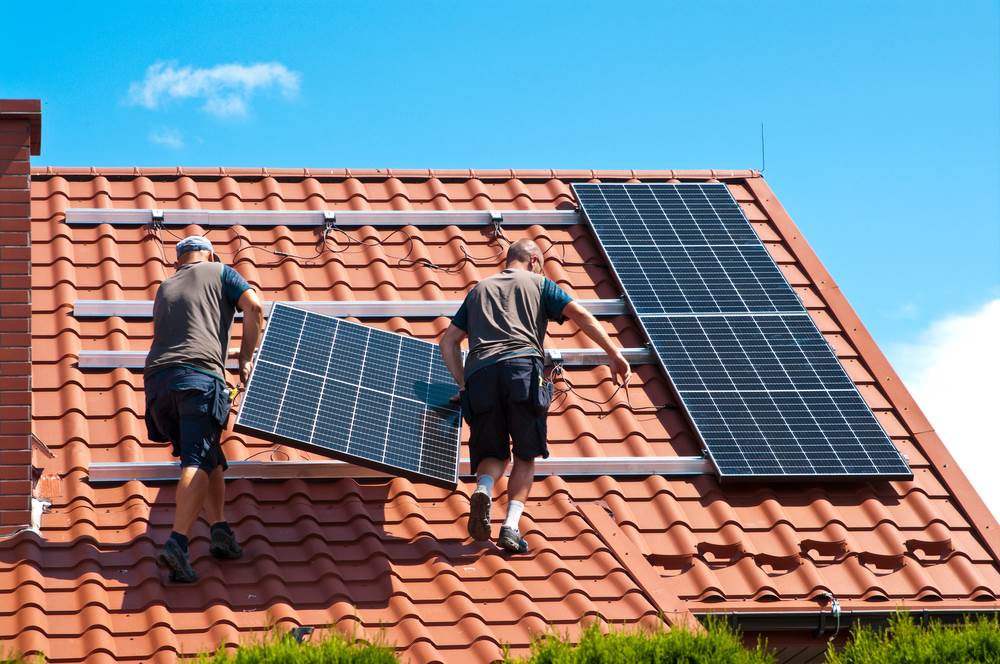
Installing solar panels on different roof types requires specific techniques and considerations. Here’s a step-by-step guide on how to install solar panels on asphalt, clay tile, and concrete tile roofs.
Asphalt Roof Installation
- Begin by assessing your roof’s condition and ensuring it can support the weight of solar panels.
- Clean the roof surface thoroughly to remove any dirt or debris that may hinder proper installation.
- Install roof flashings and attach them securely to prevent any water leaks.
- Determine the optimal panel placement by considering factors such as shade coverage, orientation, and tilt angle.
- Secure the mounting brackets onto the roof using appropriate fasteners, ensuring they are aligned correctly.
- Attach the rails to the mounting brackets, providing a sturdy base for the solar panels.
- Connect the solar panels to the rails using clamps, ensuring a secure and stable attachment.
- Install the wiring conduit to protect the electrical cables and ensure a neat appearance.
- Connect the solar panels to the wiring conduit, following the manufacturer’s instructions and safety guidelines.
- Finally, connect the solar panels to the inverter, which converts the DC power generated by the panels into usable AC power for your home.
Clay Tile Roof Installation


- Carefully remove the clay tiles from the installation area to create space for the solar panels.
- Install flashing brackets onto the roof, making sure they align with the clay tiles’ placement.
- Securely attach the mounting brackets to the roof using appropriate fasteners, ensuring a strong foundation.
- Place the rails onto the mounting brackets and align them properly.
- Reinstall the clay tiles around the rails, ensuring they fit snugly and maintain the roof’s integrity.
- Attach the solar panels to the rails using clamps, following the manufacturer’s instructions.
- Connect the panels to the wiring conduit and ensure proper cable management for a clean installation.
- Connect the solar panels to the inverter, checking for correct wiring connections and compliance with safety standards.
- Test the system’s functionality and ensure the solar panels are generating power efficiently.
- Reinstall any remaining clay tiles and perform a final inspection to verify the installation’s quality and integrity. Keep in mind all these solar panel installation guidelines while installing panles.
Concrete Tile Roof Installation
- Evaluate the concrete tile roof’s condition and reinforce any weak areas if necessary.
- Install flashing brackets onto the roof, aligning them with the concrete tiles for a seamless appearance.
- Secure the mounting brackets to the roof using suitable fasteners, ensuring stability and durability.
- Place the rails onto the mounting brackets and align them accurately to support the solar panels.
- Reinstall the concrete tiles around the rails, ensuring a tight fit that maintains the roof’s structural integrity.
- Attach the solar panels to the rails using clamps, following the manufacturer’s guidelines for proper installation.
- Connect the panels to the wiring conduit and ensure organized cable management for a tidy appearance.
- Connect the solar panels to the inverter, double-checking all wiring connections for accuracy and safety.
- Test the solar panel system’s performance and ensure it’s generating the expected amount of electricity.
- Conduct a final inspection to ensure the concrete tile roof remains intact and the solar panel installation meets all safety standards.
Frequently Askd Questions
Yes, you can install solar panels on an old asphalt roof. However, it’s essential to assess the roof’s condition and make any necessary repairs or reinforcements to ensure its structural integrity.
Yes, installing solar panels on clay tile roofs requires careful removal and reinstallation of the tiles. Flashing brackets and mounting brackets should be securely attached to maintain the roof’s waterproofing.
Yes, it is possible to install solar panels on a concrete tile roof without damaging the tiles. The installation process involves removing specific tiles, installing the necessary brackets and rails, and then reinstalling the tiles carefully.
It’s crucial to prioritize safety during solar panel installation. Ensure you have proper safety equipment, follow all manufacturer guidelines, and consider working with a professional installer if you’re unsure about any aspect of the process.
The installation timeline varies depending on the size of the system and the complexity of the roof. On average, it can take a few days to a week to complete the installation process.
While some homeowners choose to install solar panels themselves, it’s advisable to hire a professional installer, especially if you have a complex roof or limited experience with electrical work. Professional installers ensure a safe and efficient installation.